
Verifying your Deriv account is essential to ensure the security of your funds and to comply with regulatory requirements. The verification process typically involves submitting documents to confirm your identity and address. Here’s a step-by-step guide to help you through the verification process:
Log in to Your Deriv Account:
- Open the Deriv website or app.
- Enter your credentials to log in.
Access the Verification Section:
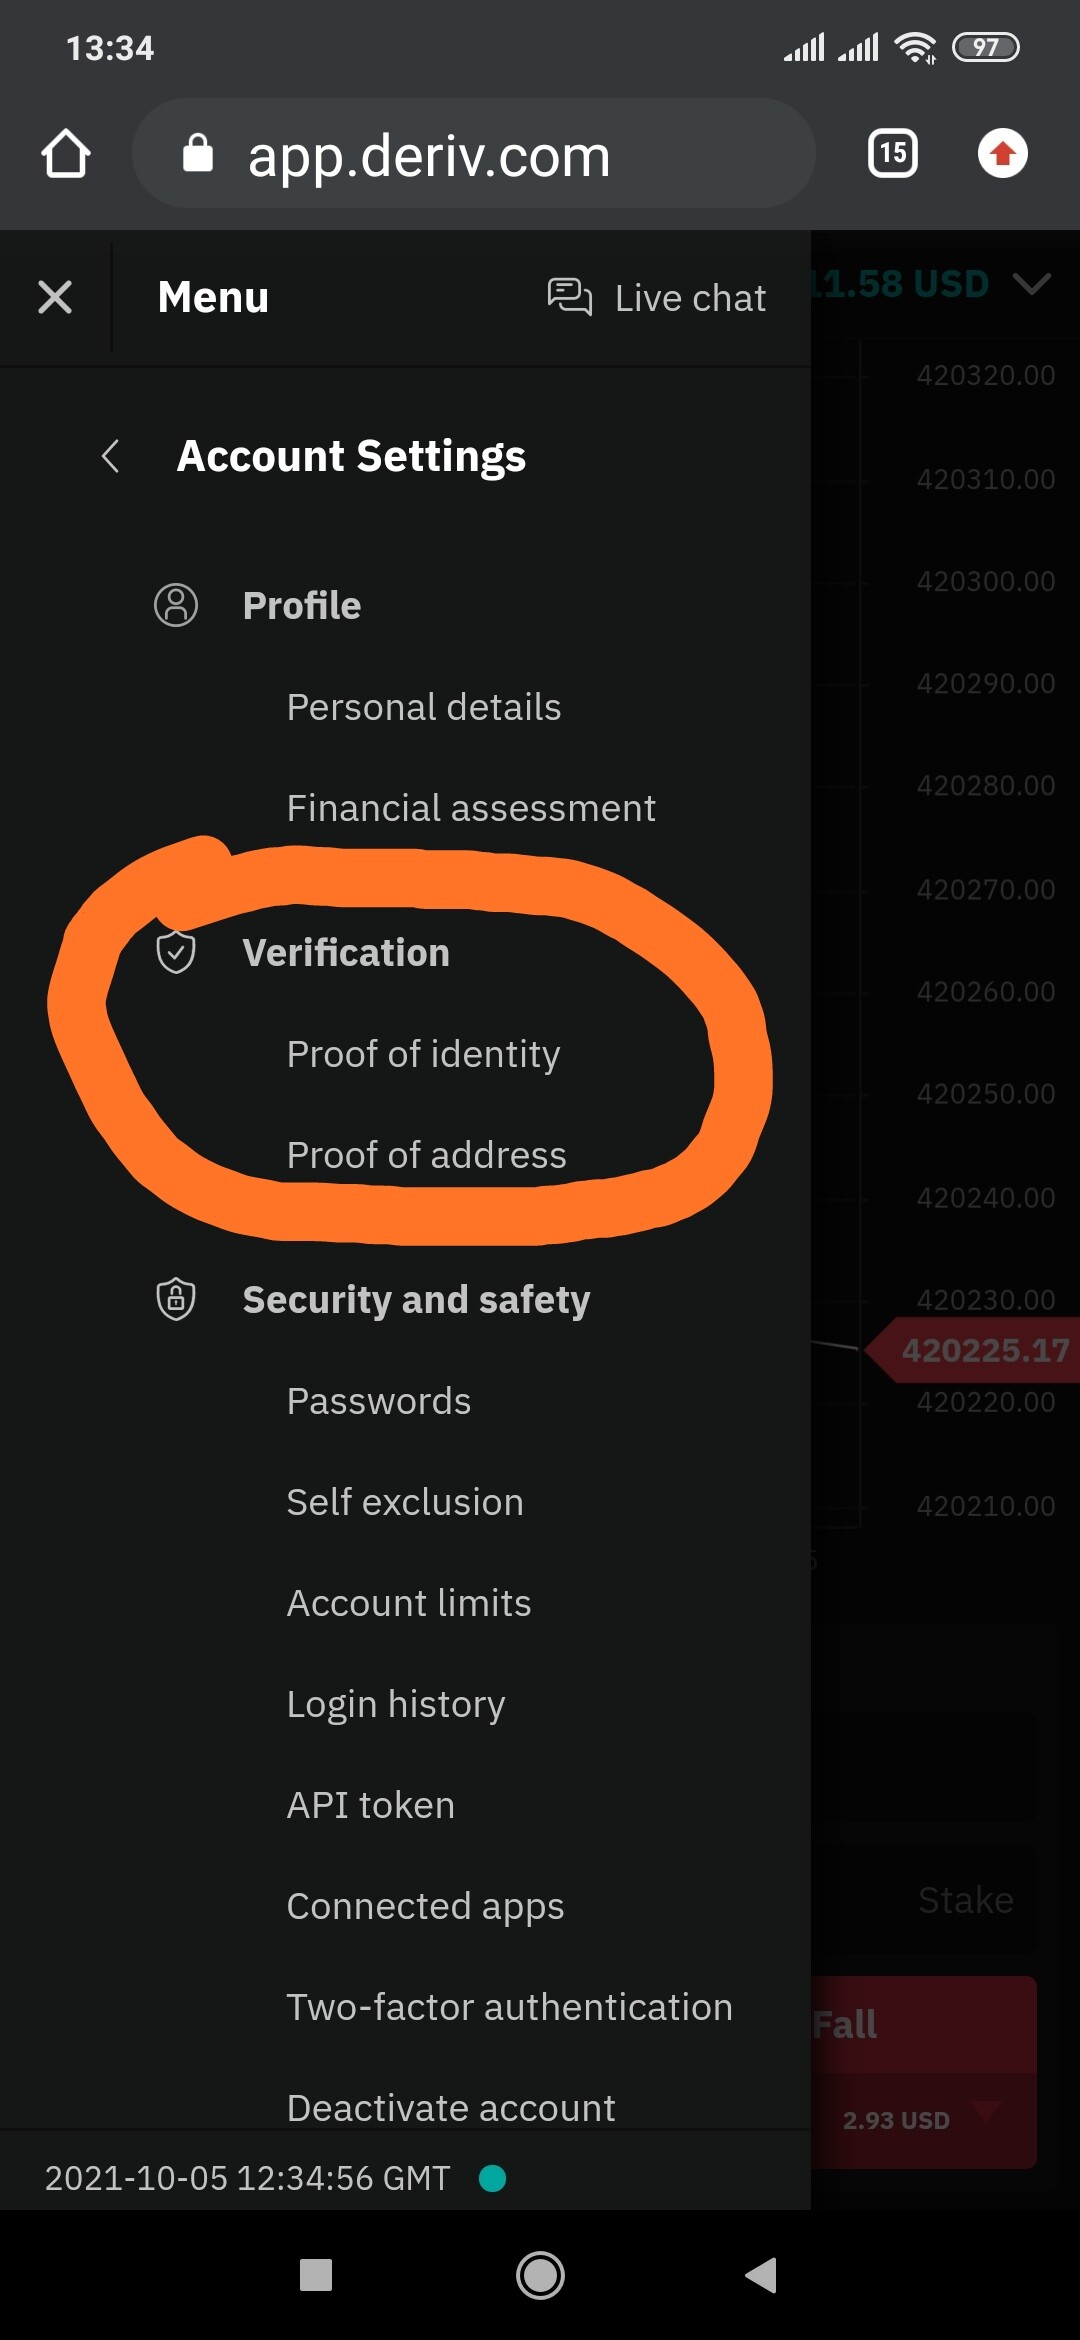
- Once logged in, navigate to the ‘Account Settings’ or ‘Profile’ section.
- Look for the ‘Verification’ or ‘Identity Verification’ option.


Start the Verification Process:
- Click on the ‘Verify Now’ or equivalent button to begin the process.
Submit Identity Verification Documents:
- Government-Issued ID: Upload a clear, readable copy of a government-issued ID such as a passport, driver’s license, or national ID card.
- Ensure the document is valid and not expired.
- The name on the document should match the name on your Deriv account.
- Photo Requirements: Take a clear photo of the ID. All four corners should be visible, and there should be no reflections or glare.
- Government-Issued ID: Upload a clear, readable copy of a government-issued ID such as a passport, driver’s license, or national ID card.
Submit Address Verification Documents:
- Proof of Address: Upload a document that shows your name and address. This can be a utility bill, bank statement, or any official document.
- The document should not be older than three months.
- Ensure the address matches the address on your Deriv account.
- Photo Requirements: Ensure the document is clearly readable. The entire document should be visible in the photo.
- Proof of Address: Upload a document that shows your name and address. This can be a utility bill, bank statement, or any official document.
Additional Documents (if required):
- In some cases, Deriv might request additional documents or information. Follow any additional instructions provided.
Submit Documents for Review:
- After uploading the required documents, submit them for review.
- You might receive a confirmation email indicating that your documents are under review.

Tips for a Smooth Verification Process
- Ensure Clear and Legible Photos: Use a high-resolution camera to take photos of your documents. Make sure all information is clearly visible and readable.
- Consistent Information: The information on your documents should match the information on your Deriv account. Any discrepancies can cause delays or rejections.
- Check Document Validity: Ensure that all documents are current and not expired. Outdated documents will not be accepted.
- Follow Up: If you haven’t received a confirmation within the expected timeframe, follow up with Deriv’s customer support.
Troubleshooting Common Issues
- Rejected Documents: If your documents are rejected, you will usually receive an email explaining the reason. Common reasons include unclear photos, expired documents, or mismatched information. Correct the issue and resubmit the documents.
- Pending Status: If your verification status remains pending for an extended period, contact customer support for assistance.
- Additional Information Requests: Sometimes, Deriv may request further information or documentation. Respond promptly to avoid delays.
Contacting Customer Support
If you encounter any issues or have questions during the verification process, you can contact Deriv’s customer support for assistance. They can provide guidance and help resolve any problems.
- Live Chat: Available on the Deriv website for real-time assistance.
- Email: Send an email to Deriv’s support team with your query.
- Phone: Call customer support if you prefer speaking directly with a representative.
By following these steps and tips, you can efficiently verify your Deriv account, ensuring that you can fully access all trading features and withdrawal options.


